For this installment, let’s make a 180° turn and discuss how to extract data from the disk.

Table Of Contents
But first of all, we need to answer a simple question:
Is it necessary?
Interestingly enough, this question can be rather nuanced depending on the situation. Let us consider the following cases.
GEMDOS disks
This is pretty much an open and shut case. If we can see the files on GEM desktop then we can copy them to another floppy or the hard disk.
(unless of course the files can’t be read which can mean an awful lot of things1, but let’s not go in there right now)
Boot disks
Assuming that the disk auto boots and we cannot see any files in the file system (otherwise, see case above) then we will have to do something. How complicated that something is depends on the data itself. Let us split this case into two separate ones.
Files can be deduced easily
Keep in mind that game programmers typically want to keep things simple, since making a game consists of so many tasks. So, a custom file system will be the simplest they can get away with. So this means that the “files” can start on track boundary, or (worst case) on sector boundary.
Assuming that the game is on a .ST image format (i.e. just a raw dump of the disk sectors)2, it can be viewed inside a hex editor. Asides from this being a fun activity (many programmers leave hidden messages in sectors scattered around the disk), it also means that we can look at the data. Given a 82 tracks x 2 sides x 10 sectors disk, each track is 512*10 = 5120 bytes per side, or 10240 bytes per track. It’s not then hard to check if every $2800 bytes there are zero bytes before and data after. That’s one tell-tale sign that there’s a file starting there.
Now here’s the interesting part. Most games will have the files packed with some packer. Experience has shown that quite a few games use the standard packers we all had at our disposal, such as Ice Pack, Pack-Fire, Atomik, etc. Depending on the amount of laziness (which is never to be underestimated), the fourcc (i.e. 4 first bytes) headers are left intact. Therefore there’s a possibility to see the string ICE! inside the disk image. At that point it’s not very hard to write a small tool that hunts for this header and write a sequence of files to disk. Depending on how the loader works (if it loads all data from one side or both sides) it can have an impact on our tool, but it’s not something too hard to figure out.
As always, it’s very easy to test if we did the job correctly by feeding the files into something like New Depack (get it from part #1).
Another possibility is for them to be using a standard packer, but changing the fourcc to something else. For example, Elvira The Arcade Game has the string TSM! scattered around the disk images. This is highly suspicious!
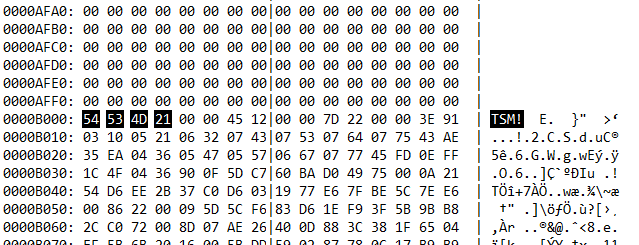
This satisfies a few of the above criteria:
- Aligned on a sector boundary
- Zeroes before the start of the file
- Repeating 4 byte header
Files are not easy to deduce
Here, the programmer has made a better job at laying down the files. Packer header is not present (or hard to detect), so in this case we have little choice than to go to the next section of this article.
Diving into the code
The loader
The previous part of the series dealt with loaders. A generic loader will be called with some parameters from various parts of the code. The parameters can be sets of:
| Parameter 1 | Parameter 2 | Parameter 3 |
|---|---|---|
| Starting physical sector | Number of sectors | Loading address |
| Starting track/side/sector | End track/side/sector | Loading address |
| Starting byte from the beginning of the disk | Number of bytes to load | Loading address |
And many more. All of the above are equivalent. It depends on the loader to make sense of the parameters and convert it to track/side/sector data to then pass on to the FDC. The parameters can be passed into registers, or as an address that contains a structure of the data. In any case, still all equivalent.
Saving files right after the loader finishes loading a file
After the loader is done for the specific file, we can stop it and write the file to disk (making use of breakpoints is a good idea, that way the debugger can stop right after a file has finished loading). As a last part, we illustrate how to do this in some of the tools.
Steem Boiler Room
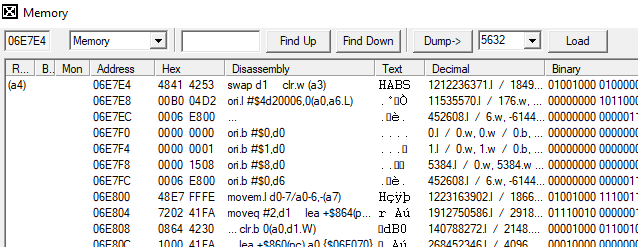
- Open a memory window (in main boiler room window right click, new memory browser)
- Make sure you’re into “memory” mode and not “instructions”
- Edit the address field to the exact start address you want to save from
- The field next to “Dump ->” button has quite a few presets of the amount of memory to save, but it can also be edited to the exact amount we want to dump
- Press “Dump ->” and choose a sensible name (for example it can be disk_track_side_sector, so it can be a distinct name and easily recognisable)
And that is all
Hatari
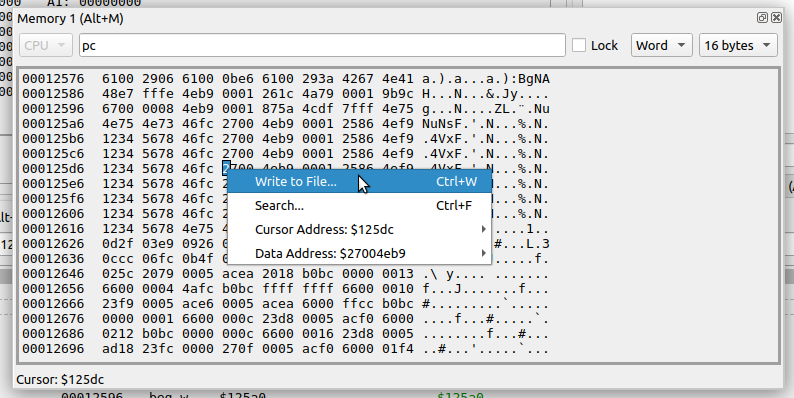
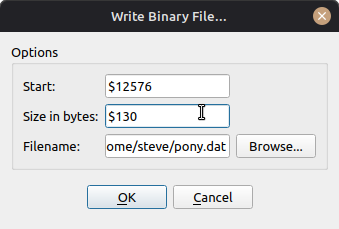
- In any Memory Window, right-click on the memory display and select ‘Write to File…’
- Choose the memory start and size (expressions using registers and symbols can be used) and the output filename
- Select OK and the file should be written to your machine.
Bugaboo
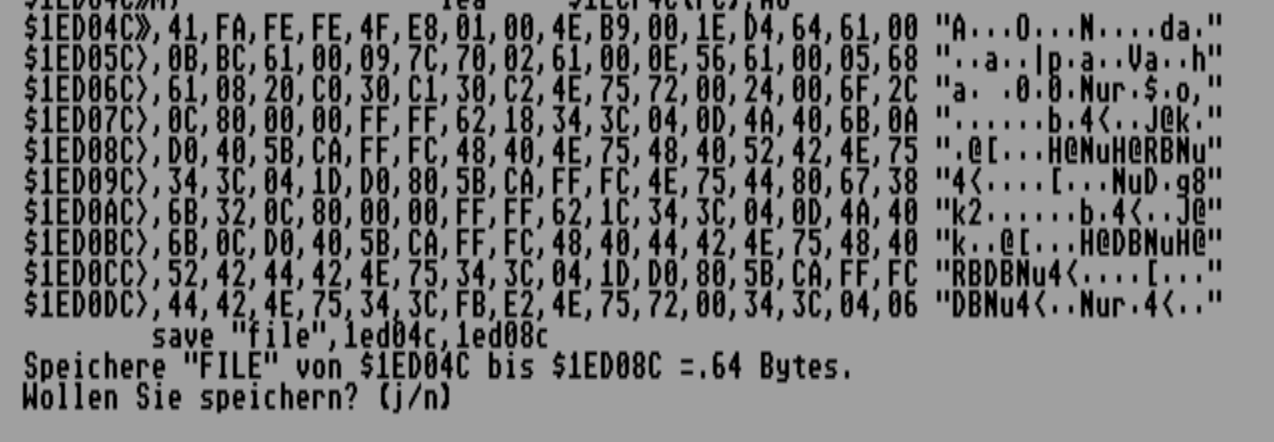
Simply utilise the SAVE command:
SAVE "FILENAME.EXT",start_address,end_address
Press ‘j’ and you shall have your file on disk (make sure you have a blank formatted disk or are saving to hard disk)
-
In practice, skip to the next section ↩︎
-
If the game is in a more complicated format, then it’s usually not a big problem to mount the image into an emulator and create a sector copy using a disk copier program like FCopy Pro. Unless the disk has a custom format, a plain sector copy will get most of the data into an .ST image. One or two read errors are expected (this is the disk protection), those can be skipped for our purposes. Otherwise, we’re stuck and have to do it the hard way (i.e. next section) ↩︎